
DIY wood projects have become increasingly popular in recent years as both a practical way to improve your home as well as a fun and engaging hobby. Woodworking allows you to create customized, high-quality furniture and decor without the high costs of buying pre-made pieces. With just some basic tools and materials, you can build everything from shelves and tables to cabinets and chairs.
The satisfaction of designing and completing your own wood creations is unmatched. You get to choose the exact look, size, and function of pieces that perfectly suit your needs. It’s also a great creative outlet that produces tangible results. Many find woodworking to be almost therapeutic, as you can immerse yourself in the craftsmanship required at each step.
While advanced woodworking requires specialized equipment, nearly anyone can get started with some essential hand and power tools. Having the right tools on hand will make your DIY projects go smoothly and safely. This guide covers the top tools that every beginning woodworker needs in their toolkit. With these tools, you’ll have the capabilities to handle basic to intermediate projects with ease. Let’s get started!
Table of Contents
Safety Equipment for DIY Wood Projects
Safety should always be the number one priority when taking on any woodworking project. Having the proper protective gear can help prevent serious injuries. Here are some of the essential safety equipment items every woodworker should have:
Goggles/Glasses
Protecting your eyesight is crucial, as wood particles and debris can easily fly into your eyes and cause damage. Wearing impact-resistant safety goggles or glasses is important anytime you are cutting, sanding, or drilling wood. Look for eyewear that wraps securely around your eyes to prevent dust and shards from entering from the sides.
Respirator/Dust Mask
Breathing in fine wood dust over time can be very hazardous to your respiratory system. A respirator or dust mask is a must when sanding, sawing, or working with certain wood types like MDF that release more dust. Opt for a respirator or mask with a rating of N95 or higher to filter out tiny dangerous particles.
Ear Protection
The high noise levels generated from power tools can harm your hearing. Be sure to wear ear plugs or noise-reduction ear muffs when using loud equipment like table saws, routers, planers, etc. Look for protective ear wear with a high NRR (noise reduction rating) of 25 or greater.
Gloves
Hand and finger injuries are common when working with sharp tools and rough materials. Wearing thick protective gloves can help prevent cuts, scrapes, splinters, and more. Leather gloves work well for general tasks. But for optimum injury protection, gloves made of cut-resistant materials are best for the highest risk tasks.
Measuring Tools for DIY Wood Projects
Accurate measurements are crucial for any DIY woodworking project. Having the right measuring tools allows you to cut pieces to precise sizes and ensures everything fits together properly. Here are some of the most important measuring tools for woodworking:
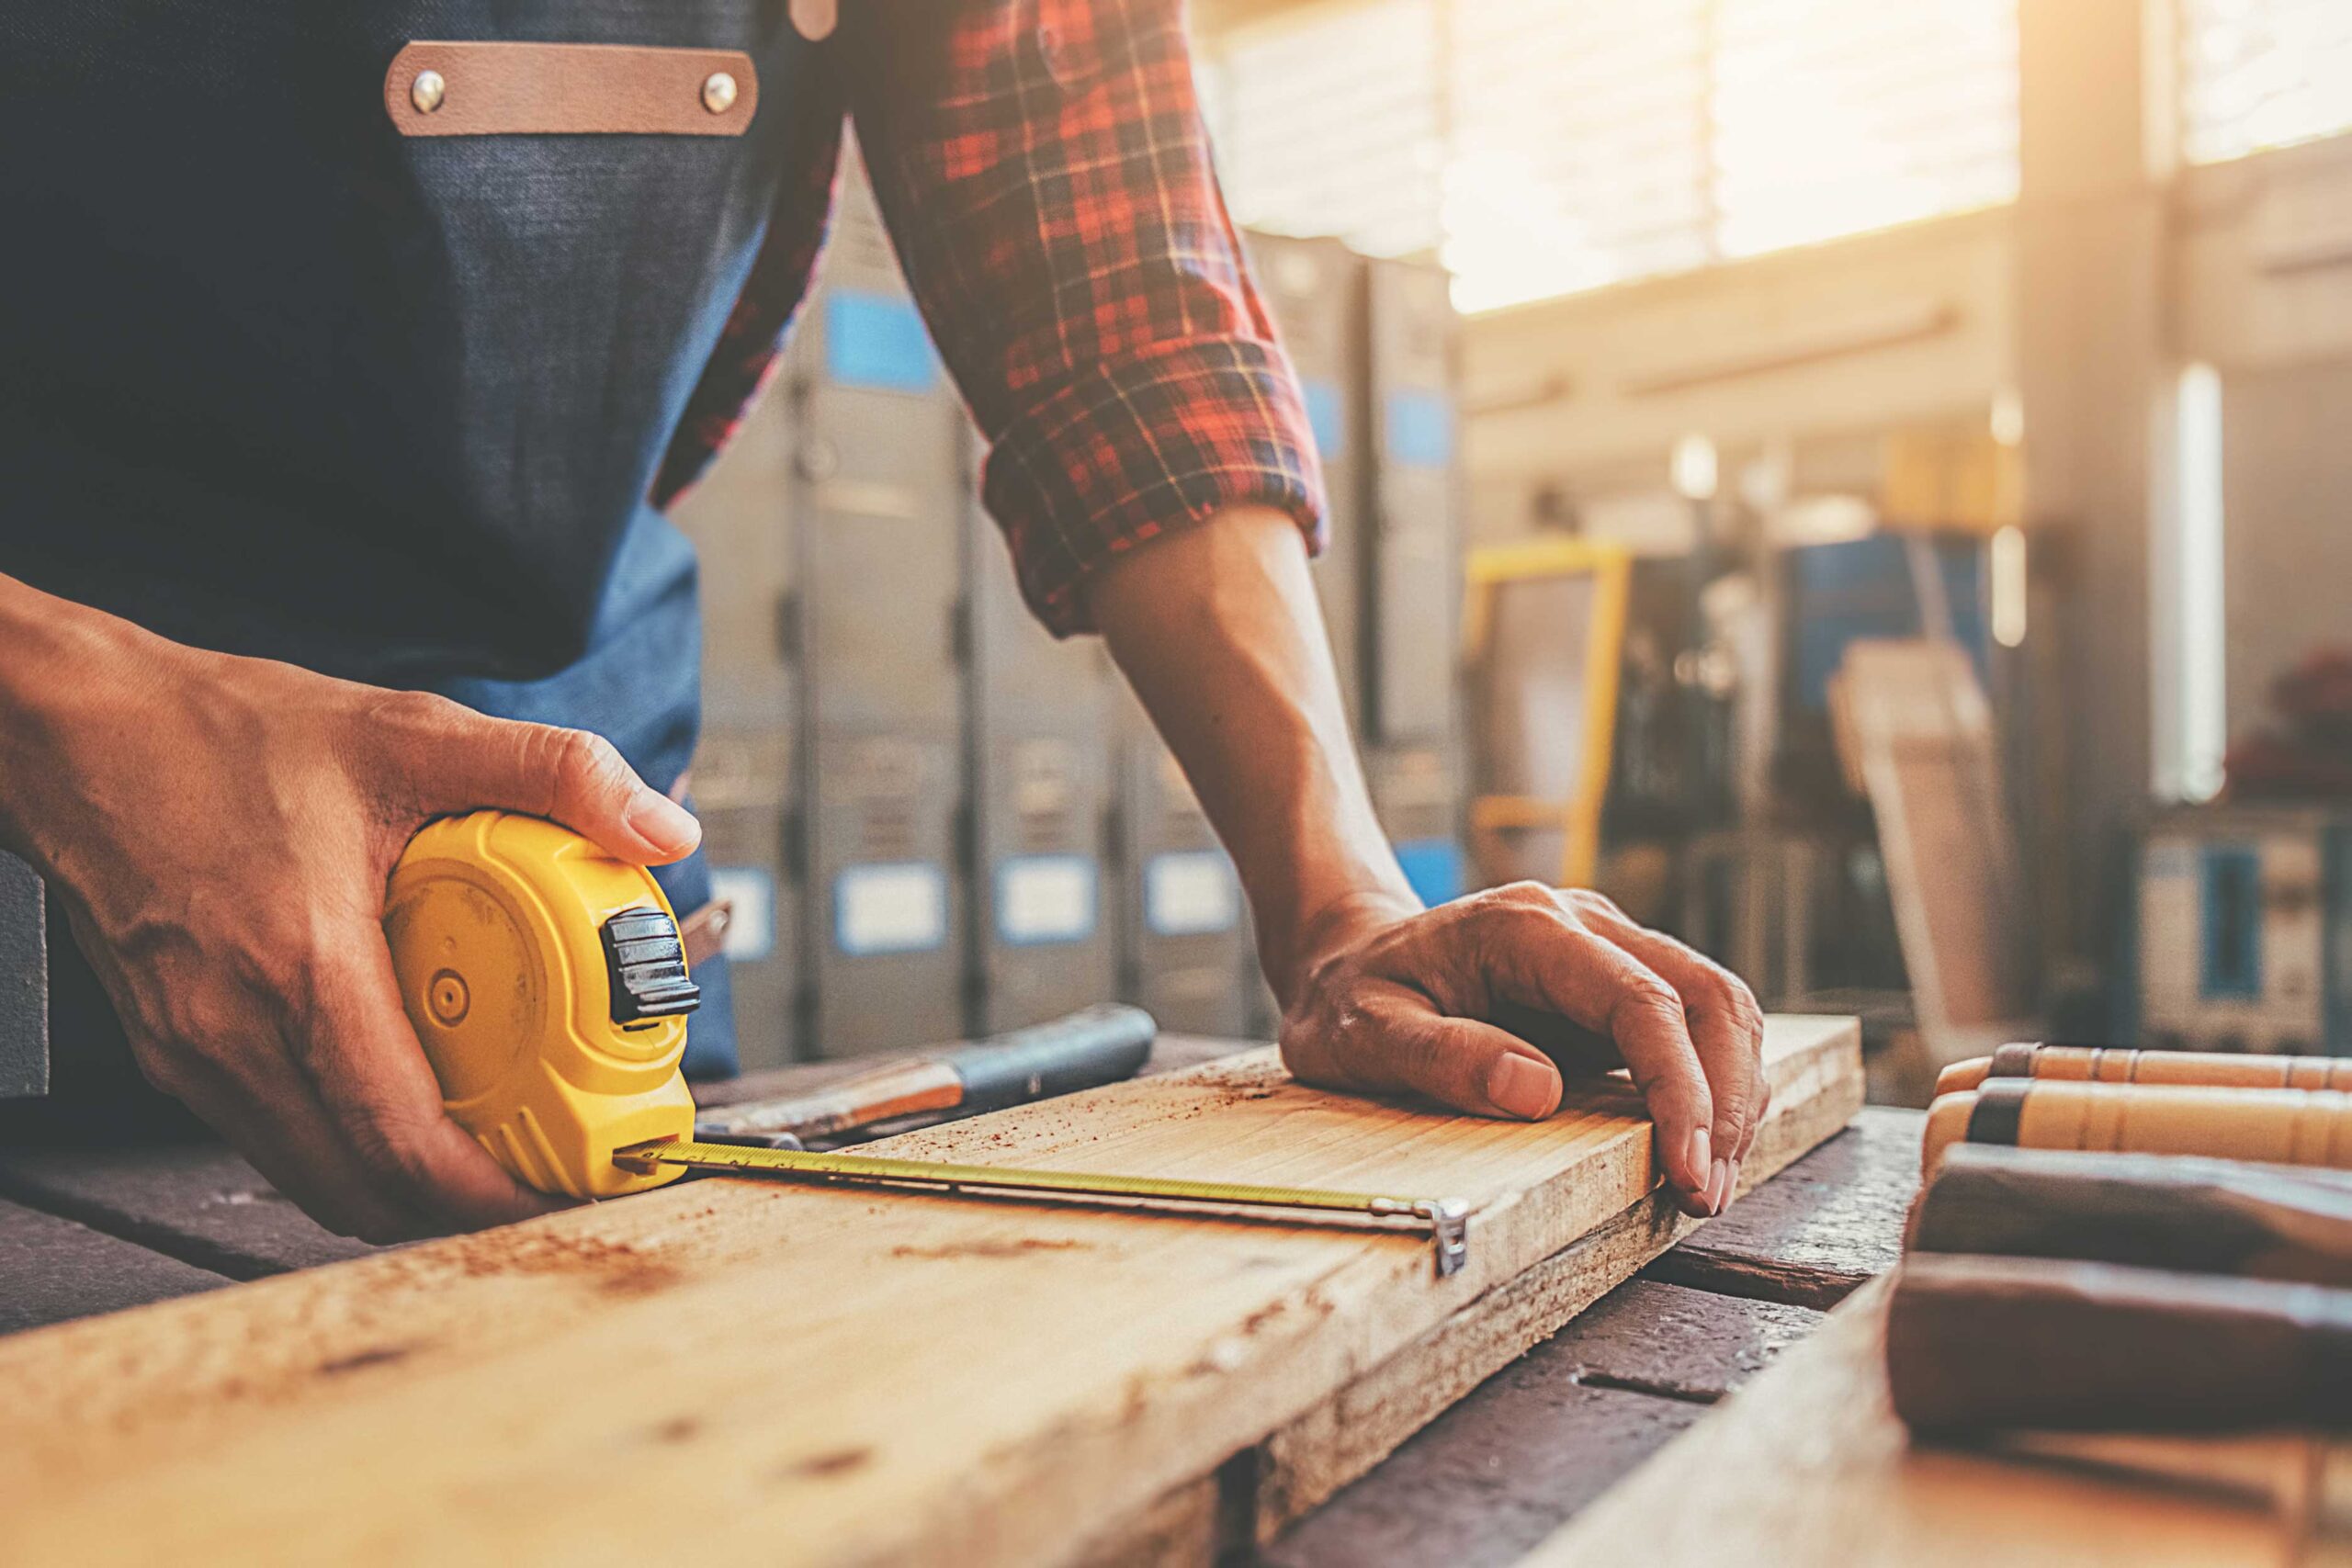
Tape Measure
A tape measure is an essential tool for taking linear measurements. Look for one that is at least 25 feet long and has markings down to 1/16 of an inch for precision. Tape measures that lock in place and have a slow retraction feature make taking measurements easier.
Rulers/Straight Edges
Rulers and straight edges are necessary for marking straight lines and checking for square. Choose sturdy metal rulers with etched markings. Longer straight edges, like 4-foot levels, are helpful for drawing lines across large boards.
Levels
A level is used to check for horizontal and vertical flatness. A standard torpedo level is handy, but consider getting larger levels like a 2- or 4-foot level for ensuring level surfaces during projects. Look for levels with both horizontal and vertical vials.
Calipers
Calipers allow you to take very precise internal, external and depth measurements. Dial calipers are easier to read than vernier calipers. Having both inside and outside calipers is useful for measuring holes and widths.
Using quality measuring tools and techniques ensures your woodworking projects have a professional fit and finish. Take time to carefully measure twice or more when accuracy is critical.
Cutting Tools for DIY Wood Projects
Cutting tools are essential for woodworking projects, allowing you to precisely size and shape wood pieces. Here are some of the most useful cutting tools for DIY wood projects:
Hand Saws
Handsaws with a coarse tooth pattern cut quickly through wood but leave a rough surface. Finer hand saws cut slower but leave a smoother cut. Common types:
- Back saws have a stiffening spine to cut precise, straight lines like for joinery.
- Coping saws have a thin, flexible blade to cut curved shapes.
- Japanese pull saws cut very finely on the pull stroke.
Power Saws
Power saws make quick work of cutting wood to size.
- Table saws have a circular blade rising through a slot in a table. Precise for ripping boards and crosscuts.
- Miter saws have a circular blade on an arm to cut angles. Great for trim work.
- Circular saws are handheld for fast, rough cuts like breaking down plywood.
Router
A versatile power tool with interchangeable bits to cut edges, joints, and decorative patterns. Especially useful for joinery and finishing.
Planer
A planer has rotating blades to shave off thin layers of wood to flatten, smooth, and reduce thickness of boards. Great for prepping rough lumber.
Drilling Tools
Drilling holes accurately is an essential woodworking skill. Three key tools are needed for drilling holes in woodworking projects:
Power Drill/Driver
A power drill/driver allows you to drill holes quickly and with less effort than a manual hand drill. Cordless drills offer the flexibility to work anywhere. Key features to look for are variable speed settings, plenty of torque, and a clutch to prevent over-driving screws. Both cordless and corded drills work well. Top brands include DeWalt, Makita, Bosch, and Milwaukee.
Choose a drill with enough power for the projects you tackle. For light duty around the house, a compact 12V drill/driver will suffice. For most common woodworking tasks, a 18-20V model provides ample power. Professional carpenters may opt for higher voltage models up to 28V. Just make sure to match your drill with appropriate amp hour batteries.
Drill Bits
High quality drill bits are essential for clean, accurate holes. Look for bits made from high-speed steel (HSS) or cobalt. Cobalt drill bits are more expensive but stay sharper longer. For woodworking, twist bits with a standard 118 degree point work well for general drilling. Spade bits are ideal for quickly boring large diameter holes. Forstner bits cut clean flat-bottom holes and are great for drilling holes to house hardware like hinges and knobs. Brad point bits excel at drilling precise holes in wood.
Countersink Bits
Countersink bits create angled openings around a drilled hole. This allows you to countersink a screw head so it sits flush with the wood surface. Countersink bits come in different sizes and angles. A common versatile option is an 82 degree countersink which matches most wood screw heads. Carbide tipped countersinks stay sharp longer. A good quality countersink bit is a woodworking essential.
With the right power drill, drill bits, and countersink bits, you’ll be equipped to drill accurate holes for assembling woodworking projects or installing hardware. Invest in quality tools and they’ll give you years of service.
Fastening Tools
One of the most important parts of any DIY woodworking project is fastening everything together securely. There are a few key fastening tools that every woodworker should have on hand:
Hammers
A basic claw hammer with a 16-20 oz head is essential for driving and pulling nails. Look for one with a comfortable grip that feels balanced in your hand. The most useful hammers for DIY projects are basic curved claw hammers, as opposed to specialized hammers like framing hammers.
Nail Guns
For large DIY projects, a nail gun can make the job go much faster. The two most common types are finish nailers and brad nailers. Finish nailers drive 15-16 gauge nails up to 2” long and are good for trim and cabinetry work. Brad nailers drive smaller 18 gauge nails up to 2” long and are good for delicate projects. Consider both pneumatic (air powered) and cordless battery powered nail guns.
Screwdrivers
A good set of screwdrivers is a must. Look for a set that includes multiple sizes of both flat head and Phillips head screwdrivers. Make sure the tips fit snugly into screw heads to avoid stripping. For maximum versatility, choose a ratcheting screwdriver that allows you to switch between different bit sizes.
Having the right fastening tools will make your woodworking projects go smoothly and produce professional results. Invest in quality hammers, nail guns, and screwdrivers suited for DIY work. With these essential fastening tools in your toolbox, you’ll be prepared to build just about any woodworking project.
Sanding Tools
Sanding is a critical step in most woodworking projects. It helps smooth rough edges and prepare surfaces for finishing. Three essential sanding tools for DIY wood projects are:
Sandpaper
Sandpaper is the most basic and versatile sanding tool. It consists of abrasive material glued to paper or cloth backing. Sandpaper comes in varying grits, with higher grits having finer abrasive particles that produce smoother sanded surfaces. Start with a lower grit like 80 or 100 to remove saw marks and shape wood. Then use progressively higher grits like 150, 220, and 400 to refine the surface. It’s helpful to have an assortment of grits on hand. For hand sanding, look for sheets with pressure-sensitive adhesive backing.
Power Sander
For larger projects, a power sander can save considerable time and effort compared to hand sanding. Orbital and belt sanders are common varieties for DIYers. Orbital sanders have a vibrating, circular sanding motion that prevents leaving swirl marks. Belt sanders feature continuous sanding belts that are ideal for smoothing large, flat surfaces. Pay attention to the motor power, dust collection, and ease of paper changes when selecting a model. Proper use is also key to prevent over-sanding and uneven spots.
Sanding Blocks
Sanding blocks hold sandpaper and make it easier to sand contoured pieces and hard-to-reach areas by hand. Simple rubber sanding blocks work for general tasks. For more control, shaped sanding blocks and pads conform to specific profiles like inside curves. Sponge-like cushioned sanding blocks adapt to uneven surfaces. Custom sanding blocks can also be made by wrapping sandpaper around a block of scrap wood cut to size. With the right sanding block, it’s easier to sand smoothly along edges and intricate details.
Clamping Tools
Clamps are essential for securing wood pieces in place while glue dries or you work on a project. Here are some of the key clamping tools for DIY woodworking:
Bar Clamps
Bar clamps, also known as bar clamps, are adjustable length clamps with a bar that allows you to spread the clamping pressure along the length of the bar. They are great for gluing boards together edge-to-edge or holding frames and panels. Bar clamps come in various lengths and throat depths.
C-Clamps
C-clamps, also called C-clamp clamps, have a C-shaped frame and threaded screw pressure mechanism. The smaller throat depth makes them suitable for clamping thinner material. C-clamps are a workshop staple and useful for applying concentrated pressure.
Corner Clamps
Corner clamps provide clamping pressure on mitered joints and right-angled workpieces. This helps hold the joint tight during glue-up. Corner clamps utilize two adjustable clamping bars attached at a right angle to pull the joint tight.
Joint Clamps
Joint clamps, also called jointmaker clamps, consist of two adjustable clamping bars connected by a cross-dowel. Tightening the clamps brings the two bars together, pressing the wood joints tight. The dowel ensures the clamping pressure is evenly distributed across the joint. Joint clamps are great for assembling frames.
Having the right clamps allows you to securely hold woodworking joints and assemblies in place as the glue dries. Bar clamps, C-clamps, corner clamps, and joint clamps are essentials for DIY woodworking projects.
Finishing Tools
Finishing the woodworking project is an important final step that can really elevate the look and feel of your work. Having the right finishing tools makes achieving a smooth, professional finish much easier. Here are some of the most useful finishing tools for DIY wood projects:
Brushes
- A variety of brush types like paintbrushes, varnish brushes, and stain brushes are useful for applying different finishing products smoothly and evenly. Look for brushes with soft natural bristles and a comfortable grip.
- Foam brushes are great for getting into corners and trim areas. Angled sash brushes help reach narrow spaces. Larger brushes speed up applying finish to flat surfaces.
- It’s best to use high-quality brushes that are specifically designed for the type of finish being applied. Clean brushes thoroughly after each use.
Rags
- Lint-free cotton rags are essential for wiping away excess finish and buffing between coats. Old t-shirts or microfiber cloths work well. It’s good to have plenty on hand.
- Paper towels are also handy for finishing work. Look for heavyweight options that are highly absorbent.
- Never use a rag that has come into contact with products like paint thinners or solvents, as they can contaminate the finish. Properly dispose of used rags.
Paint Sprayer
- For larger projects, a paint sprayer can make applying stain, paint, polyurethane, etc. much faster. Electric and airless sprayers are suitable for DIY use.
- Paint sprayers require some technique to master, but produce an exceptionally smooth professional-looking finish. Practice on scrap wood first.
- Thoroughly clean the paint sprayer after each use. Apply finish in a well-ventilated area and wear a respirator mask.
Having the right finishing tools saves time and frustration. Invest in quality brushes, rags, paint sprayers and other accessories to give your woodworking projects a flawless finish.
Conclusion
Woodworking is an incredibly rewarding hobby that allows you to create beautiful, functional pieces to enjoy for years to come. However, in order to achieve success with DIY wood projects, it’s essential to have the proper tools. For beginners just starting out, focus first on gathering high-quality safety equipment, like safety glasses, ear protection, dust masks, and gloves. Invest in accurate measuring tools like tape measures, levels, squares, and rulers.
When it comes to cutting and drilling tools, start with the basics – a quality circular saw, a jigsaw, a power drill, drill bits, and drivers. Don’t forget clamps and sanders for perfecting the shape and smoothness of your wood pieces. And finally, apply beautiful finishes with staple finishing tools like orbital sanders, foam brushes, rags, and wood stains.
With practice and the right set of woodworking tools, you’ll be creating gorgeous, functional wood pieces to enjoy for years. Approach each project step-by-step, focus on safety, and don’t be afraid to make mistakes along the way. The satisfaction of completing a DIY wood project using tools you’ve mastered is incredibly rewarding.