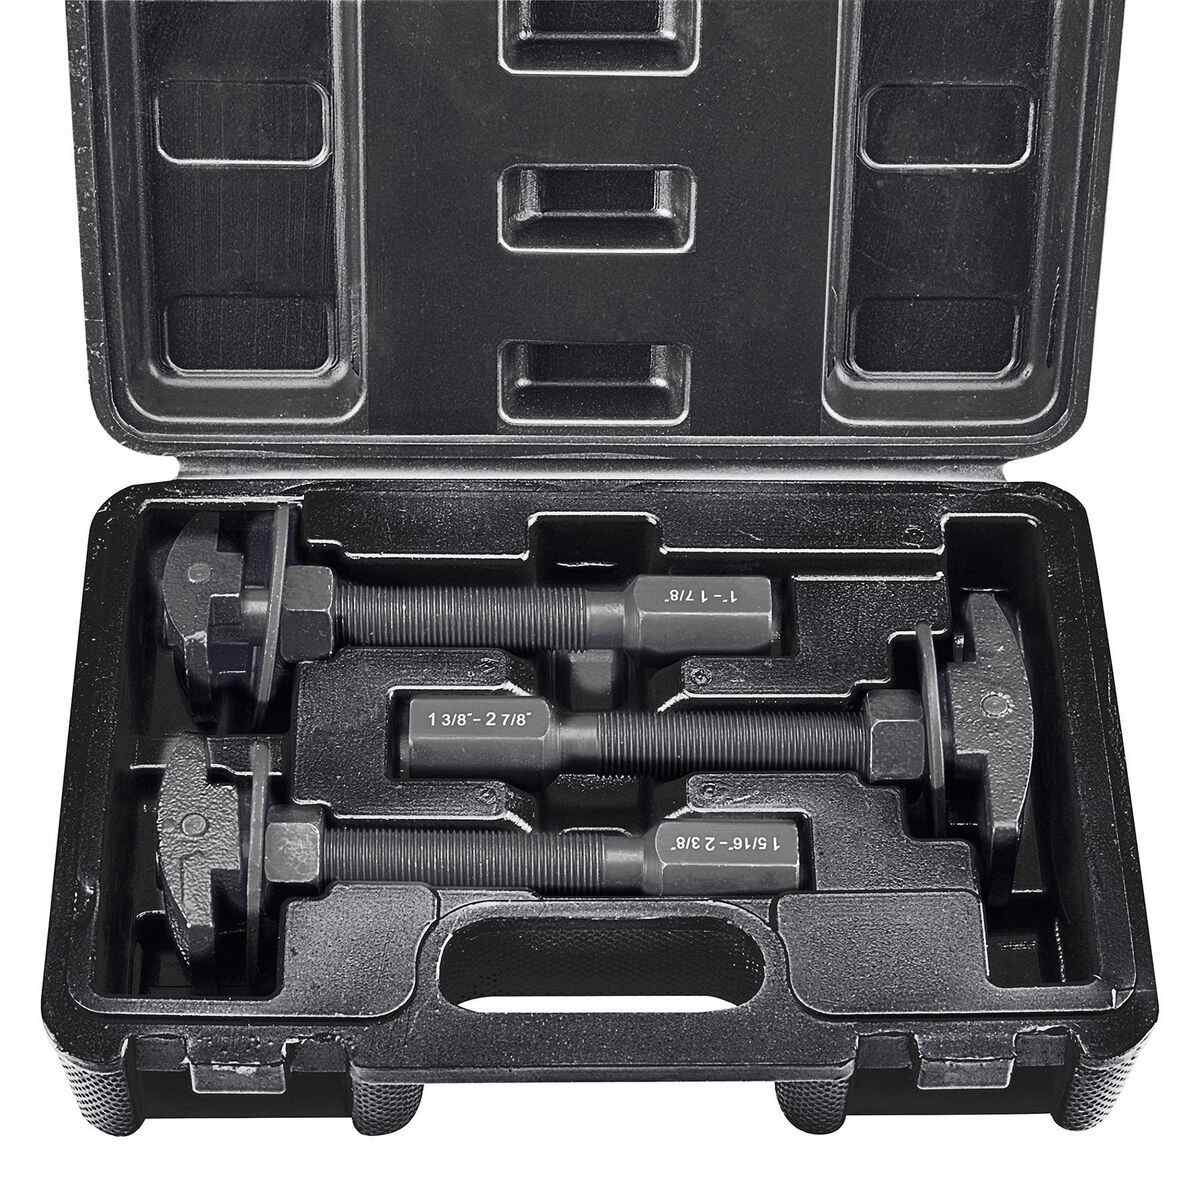
An axle bearing puller is a specialized tool used to remove bearings from the axle shafts of vehicles. Its primary purpose is to extract stubborn or seized bearings without causing damage to the axle or surrounding components.
The basic components of an axle bearing puller include:
- Puller Legs: These are the main arms or legs that grip onto the bearing’s outer race. They are designed to fit snugly around the bearing, providing a secure grip.
- Puller Shaft: This is the central shaft that connects the puller legs to the forcing screw mechanism. It is typically threaded to allow for the application of force.
- Forcing Screw: This is a large screw or bolt that applies the pulling force when tightened. As it is turned, it pushes against the axle shaft or a thrust bearing, gradually extracting the bearing from its housing.
- Thrust Bearing or Plate: This component rests against the axle shaft or housing, providing a solid surface for the forcing screw to push against, transferring the pulling force to the bearing.
By applying controlled and evenly distributed force, an axle bearing puller can overcome the friction and corrosion that often causes bearings to become stuck, allowing for their safe and effective removal.
Table of Contents
Types of Axle Bearing Pullers
Hydraulic Axle Bearing Pullers
Hydraulic axle bearing pullers are powerful tools that use hydraulic pressure to remove stubborn bearings. They consist of a hydraulic pump, a cylinder, and a set of puller arms or claws. These pullers can generate immense force, making them suitable for removing even the most stuck bearings. The hydraulic mechanism allows for a controlled and gradual application of force, reducing the risk of damage to the surrounding components.
Pros:
- Extremely high pulling force
- Controlled and gradual application of force
- Suitable for removing heavily seized bearings
- Can be used in tight spaces
Cons:
- More expensive than manual pullers
- Require proper maintenance and handling of hydraulic fluid
Manual/Mechanical Axle Bearing Pullers
Manual or mechanical axle bearing pullers rely on manual force applied through a threaded shaft or a sliding weight hammer mechanism. These pullers typically consist of a cross-bar, puller arms or claws, and a threaded shaft or slide hammer. They are simple, affordable, and widely available.
Pros:
- Inexpensive and readily available
- Simple and easy to use
- Portable and lightweight
- No need for external power sources
Cons:
- Limited pulling force compared to hydraulic pullers
- Require more physical effort
- May not be suitable for heavily seized bearings
Slide Hammer Axle Bearing Pullers
Slide hammer axle bearing pullers are a type of manual puller that uses a sliding weight to generate an impact force. They consist of a sliding weight or hammer that slides along a shaft, creating a jarring impact when it hits the end of the puller. This impact force can help dislodge stubborn bearings.
Pros:
- Effective for removing moderately seized bearings
- Generates impact force to overcome initial resistance
- Relatively inexpensive
Cons:
- Limited pulling force compared to hydraulic pullers
- Requires a significant amount of physical effort
- May not be suitable for heavily seized bearings
When choosing an axle bearing puller, consider factors such as the level of seizure, available space, budget, and personal preference. Hydraulic pullers offer the highest pulling force but are more expensive, while manual pullers are more affordable but may require more physical effort. Slide hammer pullers can be a good compromise, providing impact force while remaining relatively inexpensive.
When to Use an Axle Bearing Puller
An axle bearing puller is a specialized tool used to remove axle bearings from the hub assembly of a vehicle. Axle bearings are crucial components that allow the wheels to rotate smoothly on the axle. Over time, these bearings can wear out or become damaged due to various factors, such as age, excessive load, or improper lubrication. Recognizing the signs of a worn or damaged axle bearing is essential to prevent further damage and ensure safe operation of the vehicle.
One of the most common signs of a failing axle bearing is unusual noise coming from the wheel area. As the bearing deteriorates, it may produce a grinding, rumbling, or whirring sound, especially when turning or accelerating. These noises are indicative of increased friction and wear within the bearing assembly.
Another telltale sign is excessive play or looseness in the wheel. When the axle bearing is worn, it can cause the wheel to wobble or vibrate, particularly at higher speeds. This can lead to poor handling, decreased control, and potential safety hazards.
In some cases, you may notice leakage of lubricant from the wheel hub area, indicating a compromised bearing seal. This can lead to accelerated wear and potential contamination of the bearing.
If left unaddressed, a worn or damaged axle bearing can cause further damage to other components, such as the hub, axle, and suspension parts. This can result in costly repairs and potential safety risks.
It is crucial to replace axle bearings promptly when signs of wear or damage are detected. Neglecting to do so can lead to catastrophic failure, potentially causing the wheel to separate from the vehicle, which can be extremely dangerous. Using an axle bearing puller is an essential step in the replacement process, as it allows for the safe and proper removal of the old bearing without causing additional damage.
How to Use an Axle Bearing Puller
Using an axle bearing puller is a straightforward process, but it requires careful preparation and adherence to safety protocols. Here’s a step-by-step guide on how to use an axle bearing puller effectively:
- Prepare the Work Area: Ensure that you have a clean, well-lit, and organized workspace. Clear the area around the vehicle to provide ample room for movement and tool access.
- Gather the Required Tools: In addition to the axle bearing puller, you’ll need a few other tools, such as a hammer, breaker bar, socket set, and any other specialized tools recommended by the vehicle manufacturer.
- Immobilize the Vehicle: Engage the parking brake and chock the wheels to prevent the vehicle from moving during the bearing removal process.
- Remove the Wheel and Brake Components: Follow the manufacturer’s instructions to remove the wheel, brake caliper, and any other components necessary to access the axle bearing.
- Inspect the Axle Bearing: Carefully inspect the axle bearing for any visible signs of damage or wear. If the bearing is in poor condition, it should be replaced.
- Set Up the Axle Bearing Puller: Refer to the puller’s instructions and properly assemble the tool. Ensure that all components are securely tightened and aligned with the axle bearing.
- Apply Force to the Puller: Using a hammer or breaker bar, apply firm and consistent force to the puller’s striking surface. This action will gradually pull the bearing off the axle shaft.
- Remove the Bearing: Once the bearing is loose, carefully remove it from the axle shaft, taking care not to damage any surrounding components.
- Clean and Inspect: Thoroughly clean the axle shaft and the bearing housing, removing any debris or contaminants. Inspect the components for any signs of wear or damage.
- Install the New Bearing: Follow the manufacturer’s instructions for properly installing the new axle bearing, using any specialized tools or techniques recommended.
- Reassemble the Components: Reverse the disassembly process, reinstalling the brake components, wheel, and any other parts you removed.
- Torque Specifications: Ensure that all bolts and fasteners are tightened to the manufacturer’s specified torque values.
- Test and Verify: Once reassembled, test the vehicle’s operation, checking for any unusual noises or vibrations that may indicate an issue with the new bearing installation.
Safety Precautions:
- Always wear appropriate personal protective equipment (PPE), such as safety glasses, gloves, and steel-toed boots.
- Use jack stands or appropriate vehicle support when working under a raised vehicle.
- Follow all manufacturer’s instructions and warnings regarding the use of the axle bearing puller and other tools.
- Ensure that the puller is properly aligned and secured before applying force.
- Exercise caution when using hammers or breaker bars to avoid injury from slips or missed strikes.
Required Tools:
- Axle bearing puller (specific to your vehicle’s make and model)
- Hammer or breaker bar
- Socket set
- Torque wrench
- Jack stands (if working under a raised vehicle)
- Any specialized tools recommended by the vehicle manufacturer
Remember, proper preparation, adherence to safety protocols, and following the manufacturer’s instructions are crucial for a successful axle bearing replacement using an axle bearing puller.
Choosing the Right Axle Bearing Puller
Selecting the appropriate axle bearing puller is crucial for a successful and safe bearing removal process. Several factors should be considered when choosing the right puller tool.
Vehicle Type and Application
The type of vehicle and its intended application play a significant role in determining the suitable axle bearing puller. Pullers designed for passenger cars may not be robust enough for heavy-duty trucks or industrial machinery. It’s essential to select a puller that can handle the load and size requirements of your specific vehicle or equipment.
Bearing Size and Configuration
Axle bearings come in various sizes and configurations, such as straight or tapered roller bearings. Ensure that the puller you choose is compatible with the bearing size and type you need to remove. Most pullers are designed to accommodate a specific range of bearing diameters, so it’s crucial to measure the bearing accurately before making a purchase.
Material and Construction
Axle bearing pullers are subjected to significant forces during the removal process, so they must be constructed from durable materials that can withstand high stress loads. Look for pullers made from high-quality steel or other robust materials that can resist deformation and breakage.
Popular Brands
Several reputable brands are known for manufacturing high-quality axle bearing pullers. Some of the most popular and trusted brands include:
- OTC Tools
- Lisle
- TEKTON
- Powerbuilt
- ESCO
- EMCO
These brands offer a wide range of pullers designed for various applications, from DIY projects to professional automotive and industrial use. Their products are typically well-made, durable, and backed by warranties or customer support.
When choosing an axle bearing puller, consider the specific requirements of your vehicle or equipment, as well as the brand’s reputation for quality and durability. It’s often better to invest in a high-quality puller from a trusted brand, as it will provide better performance, safety, and longevity in the long run.
Axle Bearing Puller Maintenance
Proper maintenance of your axle bearing puller is crucial to ensure its longevity and safe operation. Regular cleaning, proper storage, and inspection for wear or damage are essential steps in maintaining your puller.
Cleaning
After each use, it’s important to clean your axle bearing puller thoroughly. Remove any grease, dirt, or debris that may have accumulated during the pulling process. Use a degreaser or solvent to remove stubborn grime, and then wipe down the puller with a clean cloth. Ensure that all moving parts are free of debris and operate smoothly.
Storage
When not in use, store your axle bearing puller in a dry, clean environment. Avoid exposing it to moisture or extreme temperatures, as this can cause corrosion and damage to the puller’s components. If possible, store the puller in its original case or a protective covering to prevent accidental damage.
Inspection for Wear and Damage
Regularly inspect your axle bearing puller for signs of wear or damage. Check for cracks, bends, or deformities in the puller’s components, as these can compromise its strength and effectiveness. Pay close attention to the threads, as damaged threads can prevent the puller from operating correctly. If you notice any significant wear or damage, it’s best to replace the affected parts or the entire puller to ensure safe and effective operation.
By following these maintenance steps, you can extend the lifespan of your axle bearing puller and ensure that it performs optimally when you need it most.
Common Mistakes When Using Axle Bearing Pullers
Using an axle bearing puller may seem straightforward, but there are several common mistakes that can lead to frustration, damage, or even injury. Improper technique, using the wrong puller, and safety oversights are among the most frequent errors.
Improper Technique: One of the most common mistakes is applying the puller incorrectly. Failing to align the puller properly or not following the manufacturer’s instructions can cause the puller to bind or slip, potentially damaging the bearing or surrounding components. It’s essential to carefully read and follow the instructions for your specific puller and application.
Using the Wrong Puller: Not all axle bearing pullers are created equal. Using a puller that is too small or not designed for the specific application can lead to frustration and potential damage. It’s crucial to select the appropriate puller for the job, considering factors such as bearing size, vehicle make and model, and the type of axle (front or rear).
Safety Oversights: Removing axle bearings can be a physically demanding task, and safety should always be a top priority. Failing to properly secure the vehicle, not using the correct personal protective equipment (PPE), or working in an unsafe environment can increase the risk of injury. Always follow proper safety protocols, including using jack stands, wearing gloves and eye protection, and working in a well-lit and organized space.
By understanding and avoiding these common mistakes, you can ensure a smoother and safer experience when using an axle bearing puller. Proper technique, the right tool for the job, and a focus on safety will help you successfully remove and replace axle bearings without unnecessary complications.
Axle Bearing Puller Accessories
While an axle bearing puller is a versatile tool, it often requires additional accessories to work effectively on different vehicles and bearing configurations. Some common accessories include:
Adapters: Bearing pullers come in various sizes and designs, and adapters allow them to fit a wider range of bearing housings and axle diameters. Adapters are typically threaded or sleeved components that bridge the gap between the puller and the bearing housing.
Slide Hammers: A slide hammer is a weighted sliding cylinder that attaches to the puller’s shaft. It provides additional force when striking the puller, helping to dislodge stubborn bearings. Slide hammers come in different weights to match the required striking force.
Bearing Splitters: For particularly stuck or seized bearings, a bearing splitter may be necessary. This tool is designed to split the bearing race, allowing the puller to remove the bearing more easily. Bearing splitters come in various sizes to accommodate different bearing diameters.
Puller Legs: Axle bearing pullers often have interchangeable puller legs or arms that grip the bearing housing or axle shaft. Having a variety of puller leg sizes and styles ensures a secure fit and proper alignment during the pulling process.
Pilot Bearings: When removing a bearing from a blind or recessed housing, a pilot bearing may be required. This small bearing fits into the puller’s shaft and helps guide and center the puller within the housing, preventing damage to the surrounding components.
Using the correct accessories can significantly improve the effectiveness and safety of an axle bearing puller, making the job easier and reducing the risk of damage to the vehicle or injury to the user.
Professional vs. DIY Axle Bearing Replacement
Replacing axle bearings can be a daunting task, and the decision to tackle it yourself or seek professional help often comes down to cost, difficulty level, and the required expertise.
Cost Comparison
Hiring a professional mechanic to replace your axle bearings can be costly, with labor charges ranging from $200 to $500 or more, depending on the make and model of your vehicle. However, doing it yourself can save you a significant amount of money, as the only expense would be the cost of the replacement bearings and any necessary tools, which can range from $50 to $200.
Difficulty Level
Replacing axle bearings is considered a moderately difficult job, especially for those without prior experience in automotive repairs. It requires specialized tools, such as a bearing puller and press, and the process can be time-consuming and physically demanding. Additionally, it may involve removing other components, such as the brake caliper or wheel hub assembly, which can increase the complexity.
Required Expertise
While it is possible for a mechanically inclined individual to replace axle bearings themselves, a certain level of expertise is required. Understanding the proper procedures, torque specifications, and safety precautions is crucial to ensure the job is done correctly and to avoid potential damage to the vehicle. Professional mechanics have the necessary training, experience, and access to specialized equipment to perform the job efficiently and safely.
Ultimately, the decision to replace axle bearings yourself or seek professional help depends on your mechanical abilities, available time, and willingness to invest in the necessary tools and knowledge. For those with limited experience or time constraints, seeking the assistance of a professional mechanic may be the safer and more convenient option, despite the higher cost.
Axle Bearing Puller Safety
Proper safety precautions are crucial when using an axle bearing puller to prevent injuries and accidents. Personal protective equipment (PPE) should be worn at all times, including safety glasses to protect your eyes from flying debris, sturdy work gloves to improve grip and protect your hands, and steel-toed boots to guard against dropped components.
Workplace setup is equally important. Ensure you have a clean, well-lit, and organized work area with plenty of space to move around the vehicle safely. Use jack stands or ramps to securely elevate the vehicle to a comfortable working height, and engage the parking brake or block the wheels to prevent accidental movement.
Handling heavy components, such as axle assemblies and bearings, can be challenging and potentially dangerous if not done correctly. Always use proper lifting techniques, bending at the knees and keeping your back straight, to avoid strains or injuries. If a component is too heavy or awkward to lift safely, don’t hesitate to ask for assistance or use mechanical aids like floor jacks or engine hoists.
Additionally, be cautious when working with compressed springs or components under tension, as they can release with significant force if not handled properly. Follow the manufacturer’s instructions carefully and use appropriate tools and techniques to safely disassemble and reassemble these components.